How to Create an Insulated Window Niche in Your Apartment: Step-by-Step Guide
What Is a Window Niche and Why You Need One
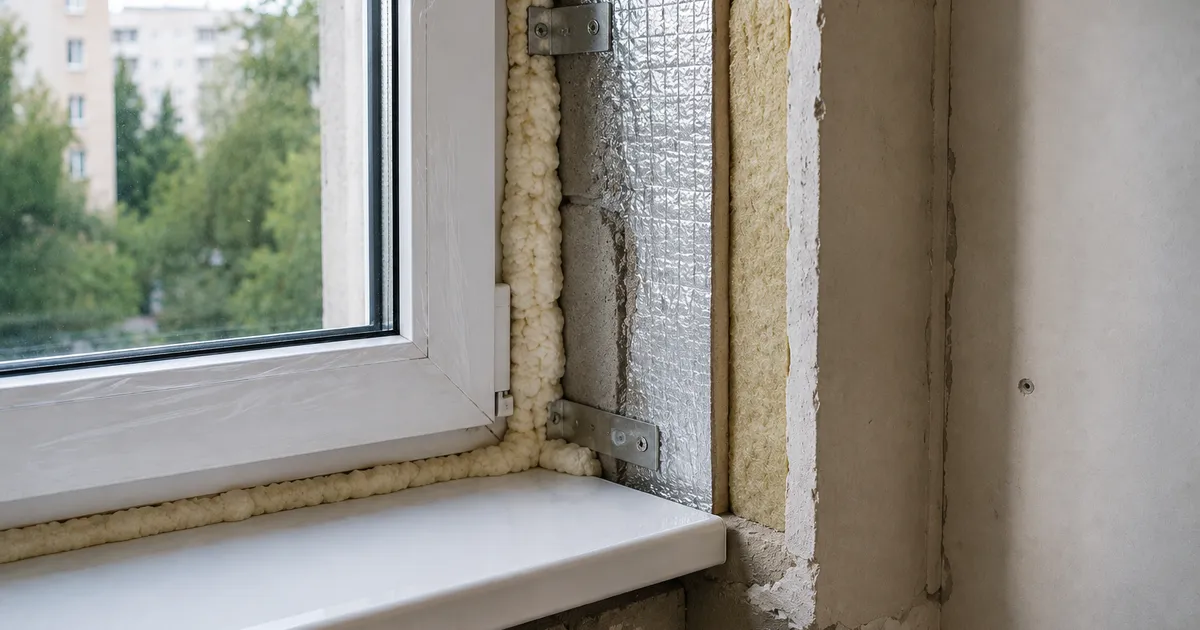
An insulated window niche is a construction that creates an additional air gap between the window and the inner wall surface. This technology significantly improves the thermal insulation of the window opening and eliminates “cold bridges.”
In typical Kyiv apartments, window openings often have insufficient wall thickness, leading to:
- Wall freezing around the window
- Condensation formation on the slopes
- Heat loss through the window opening
- Mold growth in window corners
Fact: A properly constructed window niche reduces heat loss through the window opening by 30-40%, which significantly saves on heating costs.
Creating an insulated niche is a relatively simple and effective way to improve thermal insulation without replacing windows, especially relevant for Kyiv residents.
Necessary Materials and Tools
To create a window niche, you’ll need the following materials:
Main materials:
- Expanded polystyrene EPS-25 or EPS-35 (20-50 mm thick)
- Reinforcing mesh made of fiberglass (5×5 mm or 10×10 mm)
- Plaster mixture for exterior work
- Construction adhesive for expanded polystyrene
- Umbrella dowels for additional fastening
Tools:
- Construction level
- Tape measure and pencil
- Knife for cutting expanded polystyrene
- Spatulas (wide and narrow)
- Drill or rotary hammer
- Roller for adhesive application
Tip: For better thermal insulation, use expanded polystyrene with a foil coating — it additionally reflects heat back into the room.
Step-by-Step Installation Guide
Step 1: Surface Preparation
Clean the window opening from old finishes, dirt, and dust. Check wall evenness with a level. Fill cracks and uneven areas with plaster mixture.
Step 2: Layout and Material Cutting
Measure the depth and width of the window opening. Cut the expanded polystyrene into strips of the required size, accounting for fitting allowances.
Step 3: Insulation Installation
Apply construction adhesive to the expanded polystyrene surface and the wall. Glue the insulation strips, starting from the bottom of the opening. Secure additionally with umbrella dowels (3-4 per square meter).
Step 4: Reinforcement
Apply reinforcing mesh to the expanded polystyrene surface using plaster mixture. Smooth the surface with a spatula, avoiding wrinkles and bubbles.
Step 5: Finishing
Apply the finishing plaster coat and smooth. After drying, treat the surface with primer and apply paint or other finish.
Finishing and Final Work
After insulation installation, you need to perform the final niche finishing:
Finishing options:
- Plaster — the most popular and affordable option
- Drywall — for creating a perfectly smooth surface
- PVC panels — for moisture-resistant spaces
- Decorative plaster — for creating original design
Additional recommendations:
- Always use reinforcing mesh to prevent cracks
- Ensure sealing of joints between insulation and window frame
- Install flashing for rainwater drainage
- Check the sealing of all connections
Important: Don’t forget to seal the areas where insulation meets the window frame — this is critical for achieving maximum effect.
Results and Benefits
A properly constructed window niche provides the following benefits:
Energy Efficiency:
- Heat loss reduction by 30-40%
- Heating cost savings of 15-25%
- Reduced drafts
Comfort:
- No wall freezing
- Reduced window condensation
- Improved sound insulation
Aesthetics:
- Neat appearance of the window opening
- Ability to create decorative shelves
- Extended windowsill for plants or decor
Lifespan:
- Insulation will last 20-30 years
- Minimal maintenance costs
- Ability to update finishes without replacing insulation
Summary: Investment in a window niche pays for itself in 2-3 heating seasons through reduced heating costs and improved living comfort.
UWS performs window opening insulation and window installation in Kyiv — contact us for quality insulation work.